ⓘ We are reader-supported and may earn a small commission at no additional cost to you if a purchase is made through one of our links.
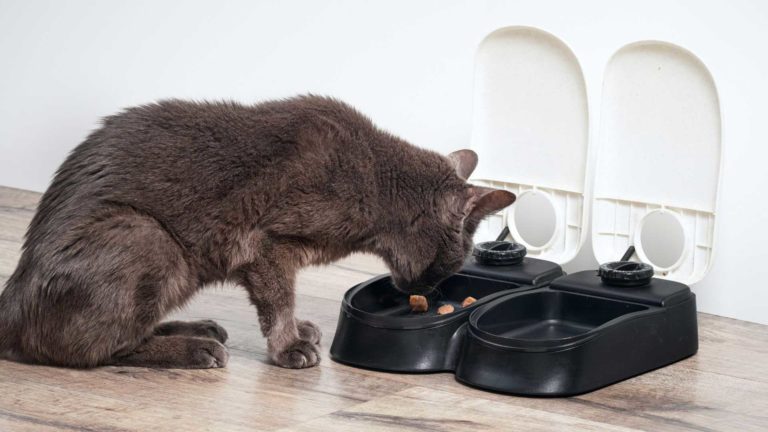
For your safety and that of your pet, you should clean your pet’s automatic feeder daily or before each refill. This will prevent the growth of bacteria, mould, and other harmful microbes. A dirty pet feeder will not only make your pet sick, but can also impact your health. According to the CDC, household pets can transmit certain groups of bacteria and germs to humans.
That said, it is your responsibility as a pet parent to ensure that your pets eat clean food and live in a clean environment. If you have an automatic pet feeder, you should see to it that the unit is properly cleaned to avoid contaminating your pet’s food. Click here to have a peek at some of the best automatic pet feeders that you can buy in Australia.
When Should I Clean an Automatic Pet Feeder?
Veterinarians recommend that you clean your pet’s automatic feeder every day after feeding your pet its last meal of the day. However, this may vary depending on the type of food that you feed your pet. If your pet prefers wet foods over dry alternatives, you should consider cleaning the dispenser before reloading it with fresh food.
Research shows that pet bowls are one of the germiest items in most households. Leaving your pet’s automatic feeder dirty for an extended period can predispose them to harmful organisms that can cause vomiting, diarrhoea, lethargy, and other life-threatening complications.
Automatic pet feeders can easily get blocked or jammed when they are not properly cleaned. Aside from cleaning, ensure that your pet feeder gets regular maintenance to keep the components in top-class condition. As a result, the unit will serve you for an extended period without it breaking down.
6 Steps for Cleaning an Automatic Pet Feeder
Automatic pet feeders come in different designs, so the cleaning procedure may vary from one unit to another. However, the below steps apply to most models of automatic pet-food dispensers:
Step 1: Unplug the feeder/remove the batteries
If you are using an electronic pet feeder, you need to disconnect the power before cleaning the unit. This will safeguard the components against damage as you handle the feeder. After removing the batteries, ensure that you store them in a cool, dry place.
Step 2: Empty the hopper
You should empty the hopper to avoid contaminating the contents during the cleaning process. Nonetheless, the food from the hopper should not be placed back in the bag. Instead, you should store it separately in a zip lock bag.
Step 3: Disassemble the pet feeder
For this step, you should refer to the manufacturer’s assembly and disassembly instructions to avoid damaging your pet feeder. Most brands will provide you with easy-to-follow instructions that can guide you on how you can detach the feeding bowl and the hopper sitting atop the unit.
Plus, a good number of automatic pet feeders feature slide-style lock systems that allow for quick and easy disassembly. Ensure that you remove all the parts that may require cleaning
Step 4: Soak the feeding bowl and grain bucket in hot soapy water
Once you have disassembled the parts, you need to place them in hot soapy water. This will kill bacteria and other harmful microbes. Let the items sit in water for 5 to 10 minutes and then scrub them using a sponge.
Through this, you will be able to remove dried food residues that may be stuck on the surface of the feeding bowl. After you are done, rinse the parts with clean water and set them to dry. To avoid cross-contamination, you shouldn’t clean the feeding bowl in your kitchen sink. Be sure to disinfect your dishwasher if you use it in cleaning the feeding bowl.
Step 5: Wipe down the feeder
Using a damp cloth, gently wipe down the feeder to eliminate surface contaminants. Be careful not to wet the feeder as this can damage the circuitry system.
Check if the parts that you washed earlier have dried up. If not, you can wipe them using a dry cloth or paper towel.
Step 6: Assemble the feeder
Securely attach the feeding bowl and the hopper to the feeder unit. Ensure that you lock the attachments to prevent the unit from falling apart when food is being dispensed. The hopper should be properly attached to prevent food from spilling when the feeder is running. Check if everything is properly attached and then connect the power system.
Conclusion
If you don’t want your pet to get sick, you need to clean your automatic pet-food dispenser regularly. Doing so will also keep the device in good working condition. If you’ve been using an automatic pet feeder, then you must be aware that these units have moving parts that can easily get jammed.
With proper cleaning, you can avoid the common problems associated with pet feeders. But most importantly, you’ll be able to protect your pet against disease-causing microorganisms. Lastly, you shouldn’t place raw foods inside the pet feeder because this can lead to the spread of diseases.


