ⓘ We are reader-supported and may earn a small commission at no additional cost to you if a purchase is made through one of our links.
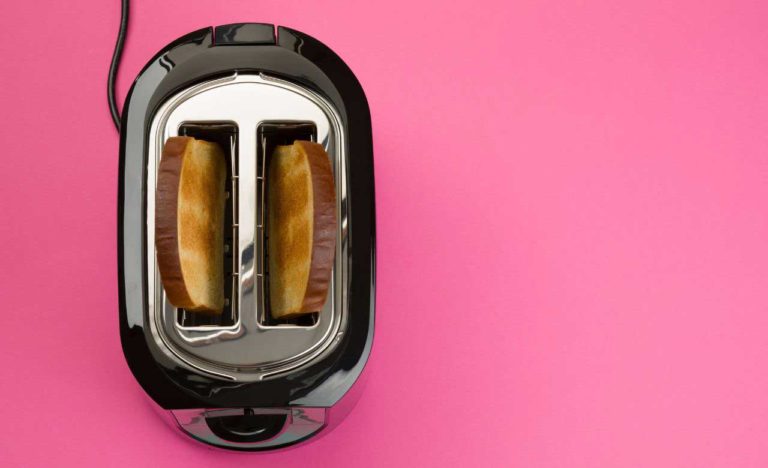
To get the best out of your toaster, ensure that you keep the unit clean. This not only extends the service life of the toaster, but also ensures you get clean and well-done toasts every time. If you don’t clean your toaster regularly, there will be a build of bread crumbs and other food particles inside the unit.
As a result, the toaster will give off an unpleasant burnt smell when you are toasting your bread. Plus, a dirty toaster can be a fire hazard since food debris in the slots could ignite when exposed to high levels of heat.
Failure to clean a toaster on a regular basis can also affect the flavour of the toast. To avoid these problems, you should see to it that your toaster is free of dust, crumbs, and greasy stains.
You can only achieve this by learning how to clean your toaster properly. This article will provide you with all the info that you may need when it comes to cleaning and maintaining your toaster. If you feel like your current toaster needs a replacement, click here to have a look at our list of the best toasters.
How to Properly Clean a Toaster
Before you start cleaning your toaster, you need to keep in mind that you are dealing with an electric device. That said, ensure that you take the necessary measures to avoid being electrocuted when cleaning the unit.
In addition to this, the toaster should be handled with care to avoid damaging its components during the cleaning process. To make your work easier, you should consider buying a toaster with a removable crumb tray. Here are 6 simple steps that you can follow when cleaning a toaster:
Step 1: Unplug your toaster
As we’ve just mentioned, toasters draw their power from electrical outlets, meaning you can easily get electrocuted if you start cleaning the appliance while it’s plugged in. For your safety, make sure that you unplug the toaster before doing anything to it.
After doing this, you can find a clutter-free workspace where you can clean the toaster without interfering with other appliances in your kitchen. If you’ve just used the toaster, you need to give it time to cool to avoid burning your fingers.
Step 2: Slide out the crumb tray
Most toaster brands fit their units with removable crumb trays that allow for easy cleaning. If your unit has this feature, place it over a paper towel and gently remove the crumb tray. The paper towel will ensure the crumbs are not scattered all over the place.
However, if you are using a toaster that does not have a crumb tray, you can turn the unit upside down. Again, gently shake it over the paper towel to remove loose bread crumbs and other food debris.
Step 3: Soak the crumb tray in warm water
The crumb tray is one of the dirtiest components in a toaster, so it needs to be thoroughly cleaned. Once you are done removing the crumbs, place the crumb tray in warm water and let it soak for 5-10 minutes.
You can add dish soap or a degreaser of your choice to eliminate sticky stains. Remove the crumb tray from the water and scrub it using a sponge. This should do away with the gunk and other stubborn stains. Let the crumb tray dry.
Note that only the crumb tray should be soaked. Keep the toaster away from water to avoid damaging the circuitry system.
Depending on the condition that the toaster was in, you may still find some stains on the surface of the crumb tray. To do away with such stains, dampen a piece of cloth with white vinegar and wipe the stained areas. Do this repeatedly until the crumb tray is spotlessly clean. Rinse the tray over tap water and let it dry.
Step 4: Clean the bread slots
As you wait for the crumb tray to dry. You can clean the toaster slots. It is recommended that you use a pastry brush, as this will help you remove any crumbs that may have been left after turning the toaster upside down.
Gently work your way into the slots until all the crumbs fall off. With the crumbs gone, you can now clean the surface of the slots. To do this, dampen the pastry brush with white vinegar for maximum cleaning effect. Try as much as you can not to soak the brush because this can damage your toaster.
To remove the smell of vinegar, use a damp cloth to wipe down the slots. It is advisable that you choose a material that cannot easily get stuck in between the slots.
Step 5: Wipe down the exterior surface of your toaster
Toasters should be cleaned from the inside out, so ensure that you wipe down the outer surfaces when you are done cleaning the slots. Using a sponge dipped in soapy water, gently scrub the exterior of your toaster.
Ensure that you properly squeeze out the water to avoid soaking the internal components. You may or may not use vinegar in this step. If your toaster has a stainless steel exterior that is heavily stained, you’ll have to rub it with vinegar. Set the toaster to dry.
Step 6: Insert the crumb tray
Once you are done with everything, you can assemble your toaster. Insert the crumb tray and set it correctly so that it performs the function for which it is designed.
Conclusion
If you follow the steps listed above, you won’t experience any problems when cleaning a toaster. You should clean your toaster once or twice a week to prevent the build-up of gunk, dirt, and crumbs. However, this may vary depending on how often you use the toaster.
When dealing with stubborn sticky stains, you can always use white vinegar when cleaning the stained areas. Keep the unit unplugged throughout the cleaning process to avoid injuries. Additionally, don’t wet the interior of your toaster. If you want to wipe down the bread slots, only use a damp cloth.


