ⓘ We are reader-supported and may earn a small commission at no additional cost to you if a purchase is made through one of our links.
We all know how crucial it is to keep our teeth clean regularly & appropriately to maintain our oral hygiene. But knowing how to properly execute that, especially with the help of an electric toothbrush is another essential task we need to learn.
Because often we tend to overlook the need to clean our teeth properly and only focus on rubbing the toothbrush with every surface of our teeth.
In this post, we’re going to discuss how to use an electric toothbrush.
Before learning about how to properly use an electric toothbrush, let’s take a brief look into some of the advantages and disadvantages of using it to become more familiar with its features and limitations.
Advantages and Disadvantages of Using Electric Toothbrush
The Advantages
Ease of Using
Since an electric toothbrush moves up and down itself constantly & at high speed, it requires less amount of effort to use as opposed to a traditional toothbrush.
Good for Children & Older People
Children are always fascinated by electronic toys. Besides, as it is a bit challenging for the parents to develop a routine habit for their children to brush regularly, an electric toothbrush can help them in this regard while making sure the areas approached by it have been cleaned thoroughly.
Similarly, older people and people with disabilities can also find it easier and more convenient to use an electric toothbrush than a traditional toothbrush.
Greater Plaque Removability
Sometimes, it can be cumbersome to remove plaque and tartar from our teeth with a traditional toothbrush. An electric toothbrush can cause up to a 21% reduction in plaque for longer-term use because of its unique cleaning mechanism.
Messaging Sensation
Electric toothbrushes do create a soothing sensation around our mouth because of their unique ability to rub and clean the areas at constant pressure.
Timer for Sufficient Cleaning
We all know it is essential to clean all four parts of our mouth for a minimum period to ensure proper cleaning and removal of any plaque and food particles, especially which are harder to remove. Since most electric toothbrushes come with an alarm function, it can be convenient to do this task regularly.
The Disadvantages
Requires Charging
Unlike traditional toothbrushes, electric toothbrushes require charging of their batteries to use them which is a bit of a hassle.
Expensive
Electric toothbrushes tend to cost much higher than those traditional toothbrushes because of their electric features, batteries, and the head that comes with them.
Requires Head Replacements
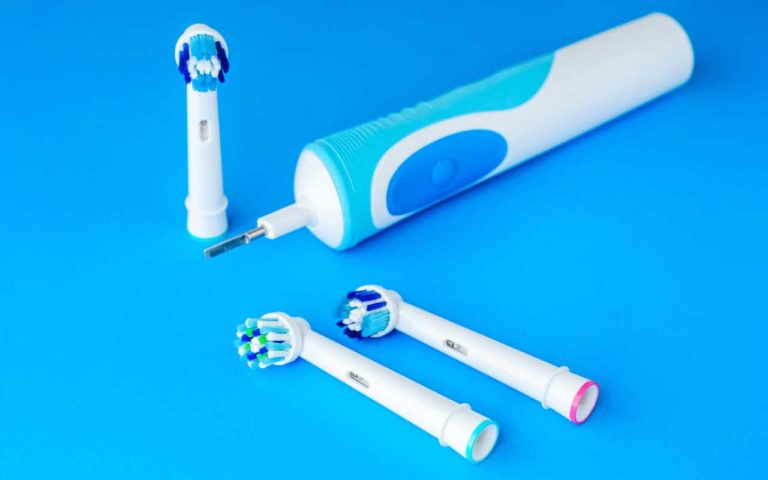
As any toothbrush bristles slowly wear out after several uses, it is required to replace the electric toothbrush head with a new one after every 3-4 months.
Need Precautions
As every electronic tool requires some precautions, electric toothbrushes are no different than that. Because it’s usually stored and used beside wet areas, you should always make sure it doesn’t fall off in the sink or any other place. There is a slight chance of getting electrocuted especially when it is on charge.
11 Steps to Use an Electric Toothbrush For Healthier Teeth
Now that we have learned about the features of an electric toothbrush, let’s learn about how to use it with 11 simple and easy-to-follow sequential steps. It would not only ensure proper cleaning but also make sure your teeth stay healthier.
Step 1: Make Sure Your Toothbrush is Fully Charged
You should always ensure your toothbrush is fully charged before every use. Instead of storing it in a brush holder or with other brushes, you can keep it on the charging holder that comes with it.
Besides, always try to keep extra batteries just in case you run out of charge in the middle of use.
Step 2: Wash the Bristles Thoroughly
Before turning on your toothbrush, make sure the bristles are thoroughly washed with clean water even if it has been cleaned after the last use. This will make sure all sorts of germ or bacteria which might be trapped inside will fall off before you use it.
Besides, always try to look for signs of wearing out of bristles to determine if it’s required for a head replacement.
Step 3: Apply Some Toothpaste
Now apply some toothpaste evenly on your brush surface to make sure it will cover your whole mouth. Another important tip is to put some water over the bristles just before you apply your toothpaste.
This will ensure efficient cleaning of your mouth and make the toothpaste liquid enough to reach all areas inside your mouth including in between the teeth.
Step 4: Split Your Mouth into Four Segments
We often do not clean all the areas in our mouth properly and might sometimes overdo in one area whilst the other areas are not being sufficiently cleaned.
To ensure you clean all the areas of your mouth evenly, you can divide your mouth area into four segments. These are the top, bottom, left, and right sides of your mouth.
Step 5: Place Your Brush’s Bristles at a 45-Degree Angle
According to ADA (American Dental Association), It is necessary to position your toothbrush at a 45-degree angle right between your teeth and gum line.
This will ensure the most efficient and effective form of cleaning your teeth and removing plaque which is also vetted by most dentists.
Step 6: Maintain the Angle and Move Your Brush Back and Forth
Now, you need to gently move your brush back and forth to clean all the areas properly while maintaining the 45-degree angle of your brush head. This will make sure you do not make any injuries by forcing the brush into a weak area whilst cleaning your teeth efficiently.
Step 7: Brush All Four Segments for at Least 2 Minutes
To avoid overcleaning in one area while overlooking another one, a rule of thumb is to clean one of the four areas of your mouth for 30 seconds at least and clean all the four segments for 2 minutes collectively. It’ll ensure all those areas have been cleaned evenly.
Step 8: Gently Clean Your Tongue and Palate
While brushing our teeth, many of us overlook the need to clean our tongue and mouth palate. This is one of the main reasons why people catch problems like bad breath.
Right after brushing our teeth, we should also gently clean the surface of our tongue and the mouth palate
Step 9: Floss in Between
Research performed by ADA showed flossing causes a reduction in interdental plaque for up to 80%. Besides, it also removes any remaining food particles which fight bad breath and bacteria buildup.
Just take about 18 inches of floss and place it in between your teeth and gently move it up and down constantly until it reaches your gum line.
Step 10: Rinse Your Mouth With a Mouthwash
Mouthwashes have the ability to remove plaque and tartar from your mouth and it also destroys any remaining germ and bacteria from your mouth which are not typically being cleaned by a toothbrush or floss.
Step 11: Clean and Store Your Electric Toothbrush
Finally, properly clean your electric toothbrush with adequate water right after using it. This will keep the bristles free from any germ and also make the toothbrush ready for the next use. Besides, store it in a clean area and in an upright position to keep it dry and free from bacteria buildup.
Conclusion
To achieve overall oral hygiene, it’s not absolutely critical to own an electric toothbrush whatsoever. You can achieve all the described methods of proper cleaning just by using a traditional toothbrush. What matters most is the use of proper techniques.
Yet, there’s no doubt that an electric toothbrush does make these steps much easier to follow. Thanks for reading.


